Deutsch
 English
 Español
 Français
 Italiano
 Nederlands
 Polski
 Português
 Русский
 Türkçe
 Svenska
 Chinese
 Magyar
How-to guide: PCIe SSD upgrade using the Dell XPS 13 (9350) as an example

For the original German article, see here.
Dell's XPS 13 is currently offered with PCIe SSDs with a capacity of up to 512 GB - although the FHD-variant is only available with drives as large as 256 GB. In addition, Dell also offers M.2 SSDs with up to 1 TB, which could be very interesting to power users. Dell ships the XPS 13 with drives from different manufacturers, so the performance might not quite be what the user was hoping for. Our review notebooks shipped with Samsung PM951-series SSDs, but there are reports out on the forums mentioning other drives.
With conventional SATA drives, it's possible to transfer the entire system - via cloning - using an external USB caddy. Suitable external solutions are not available yet for the new-style SSDs, so the only course of action is to use backup software to transfer the system to temporary storage and migrate it back after the SSD has been swapped out.
The following tutorial should apply to all Windows 10 systems equipped with PCIe SSDs (note: check the compatibility/form factor first!) - especially to the versions of the XPS 13 9350 we've reviewed so far:
Compatibility
Before the upgrade it's essential to check the compatibility of the SSD. For the Dell XPS 13 9350, the following criteria must be met:
- form factor: M.2 2280 (80 x 22 x 3,7 mm)
- interface: M.2 (PCIe)
- protocol: NVMe
Here is a selection of compatible drives:
| Model | Capacity | Read max. | Write max. | Starting price |
|---|---|---|---|---|
| Samsung SSD 950 Pro | 256 GB | 2200 MB/s | 900 MB/s | for $189 on Amazon |
| 512 GB | 2500 MB/s | 1500 MB/s | for $319 on Amazon | |
| Samsung SSD SM951 | 256 GB | 2150 MB/s | 1260 MB/s | for $167 on Amazon |
| 512 GB | 2150 MB/s | 1550 MB/s | for $289 on Amazon | |
| Samsung SSD PM951 | 256 GB | 1000 MB/s | 280 MB/s | for $109 on Amazon |
| 512 GB | 1050 MB/s | 560 MB/s | for $179 on Amazon | |
| Toshiba OCZ RD400 | 256 GB | 2600 MB/s | 1150 MB/s | for $174 on Amazon |
| 512 GB | 2600 MB/s | 1600 MB/s | for $329 on Amazon | |
| 1 TB | 2600 MB/s | 1550 MB/s | for $769 on Amazon | |
| HP Z Turbo Drive Quad Pro | 256 GB | 2150 MB/s | 1260 MB/s | for $477 on Amazon |
| 512 GB | 2150 MB/s | 1550 MB/s | for $649 on Amazon |
The Geizhals price comparison shows a complete list of compatible drives and up-to-date pricing. For more details as well as the benchmark results of individual drives, please take a look at our HDD and SSD benchmark list.
Preparation
The following checklist outlines the required items:
- compatible M.2 2280 PCIe SSD
- Torx T5 screwdriver and plastic tools/lever
- USB flash drive (FAT32 formated)
- USB HDD/SSD with enough space for system data
Data backup
According to our research, Macrium Reflect Backup Software is one of the easiest solutions to us and also the cheapest one (also see Laptopmag). The product is available free of charge and is available in German. Of course, there are other suitable solutions on the market as well. Cloning the SSD - using two adapter cards and a desktop PC - is also an alternative.
Steps 1 through 3 are also suitable if the goal is simply a complete data backup. In case of a drive failure or if the notebook gets lost or stolen, the user can restore his or her data to a new SSD or new notebook.
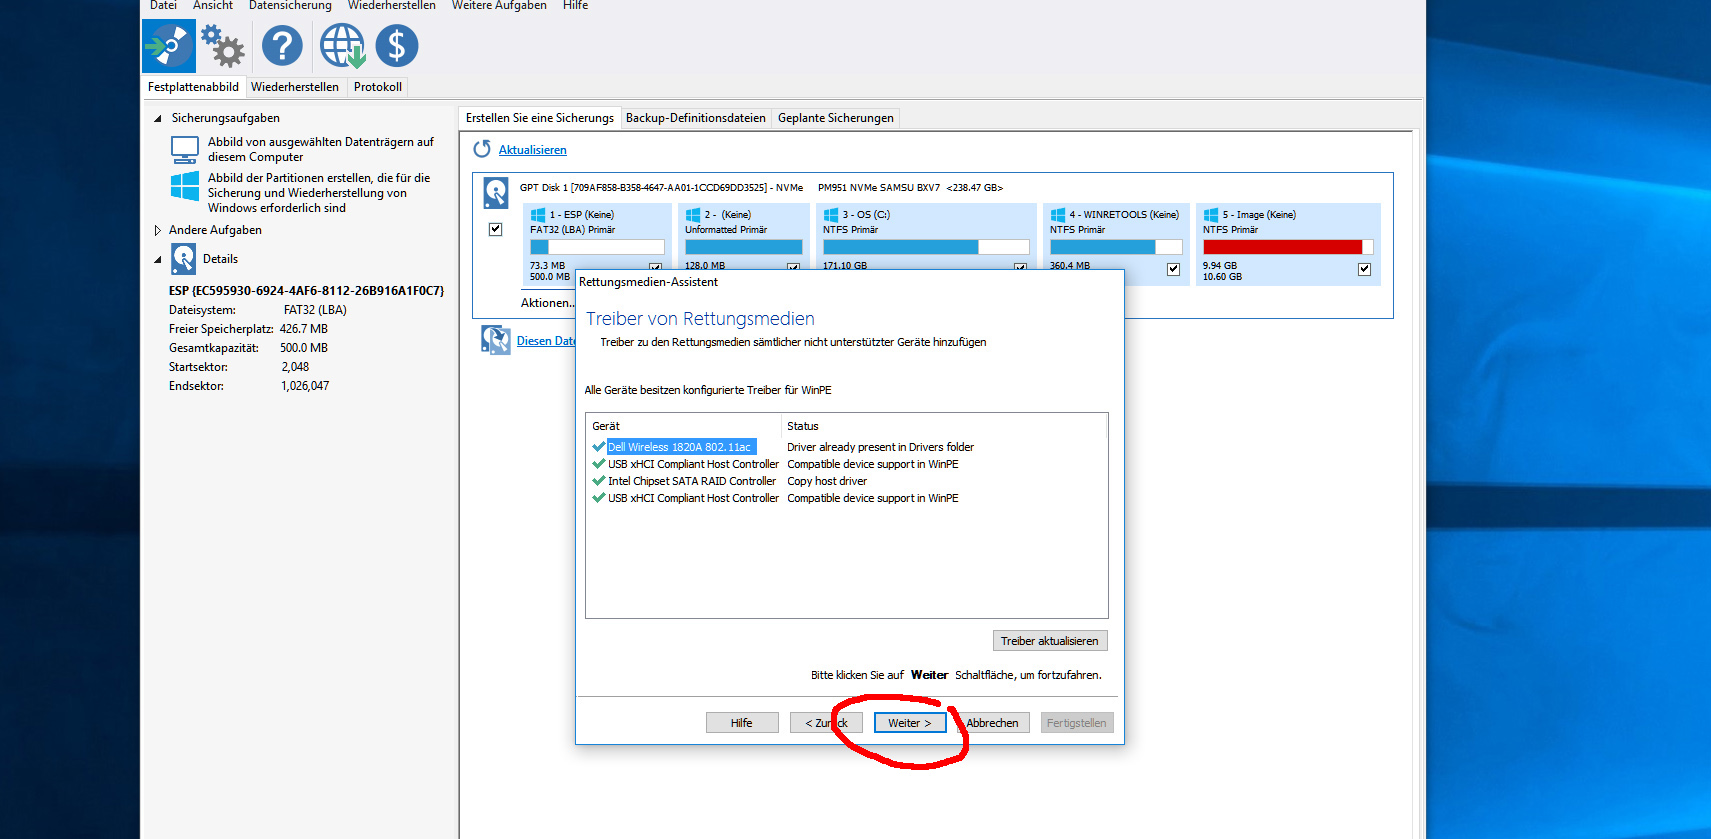
Step 1: Download and installation of the backup software
Here's the link to download the software: http://www.macrium.com/reflectfree.aspx
Step 2: Creating bootable rescue media
Click the button "Create Rescue Media" on the top right, then continue.


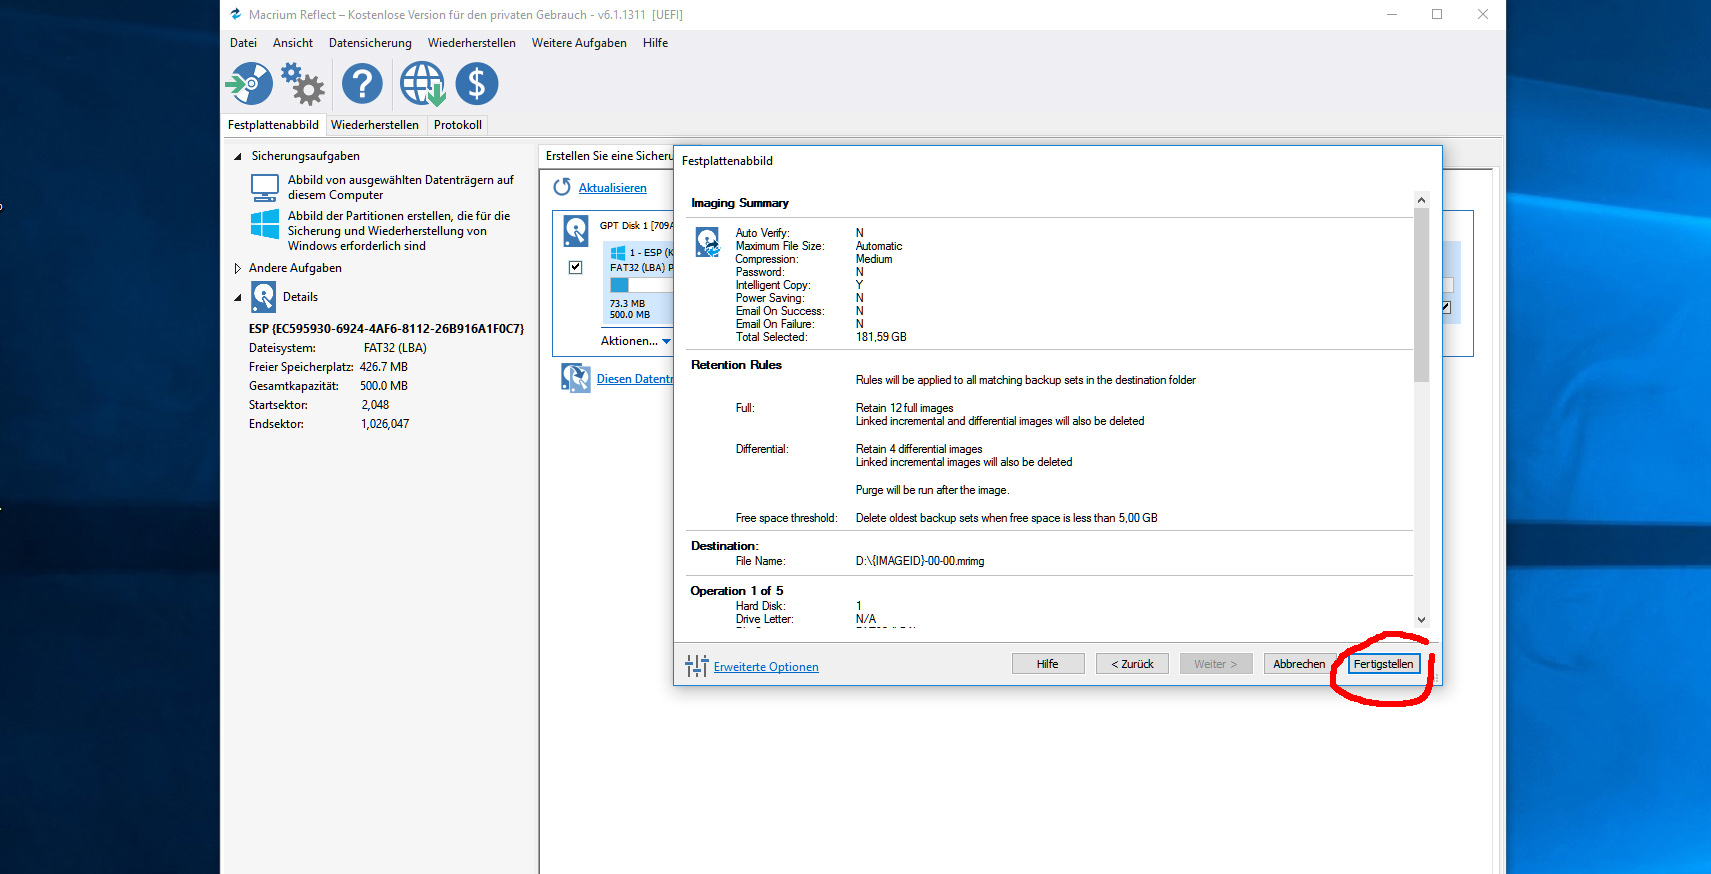
Step 3: Creating system image
Connect the data drive (USB) and start the creation of the system image. Select the drive and click "continue". Accept the defaults.


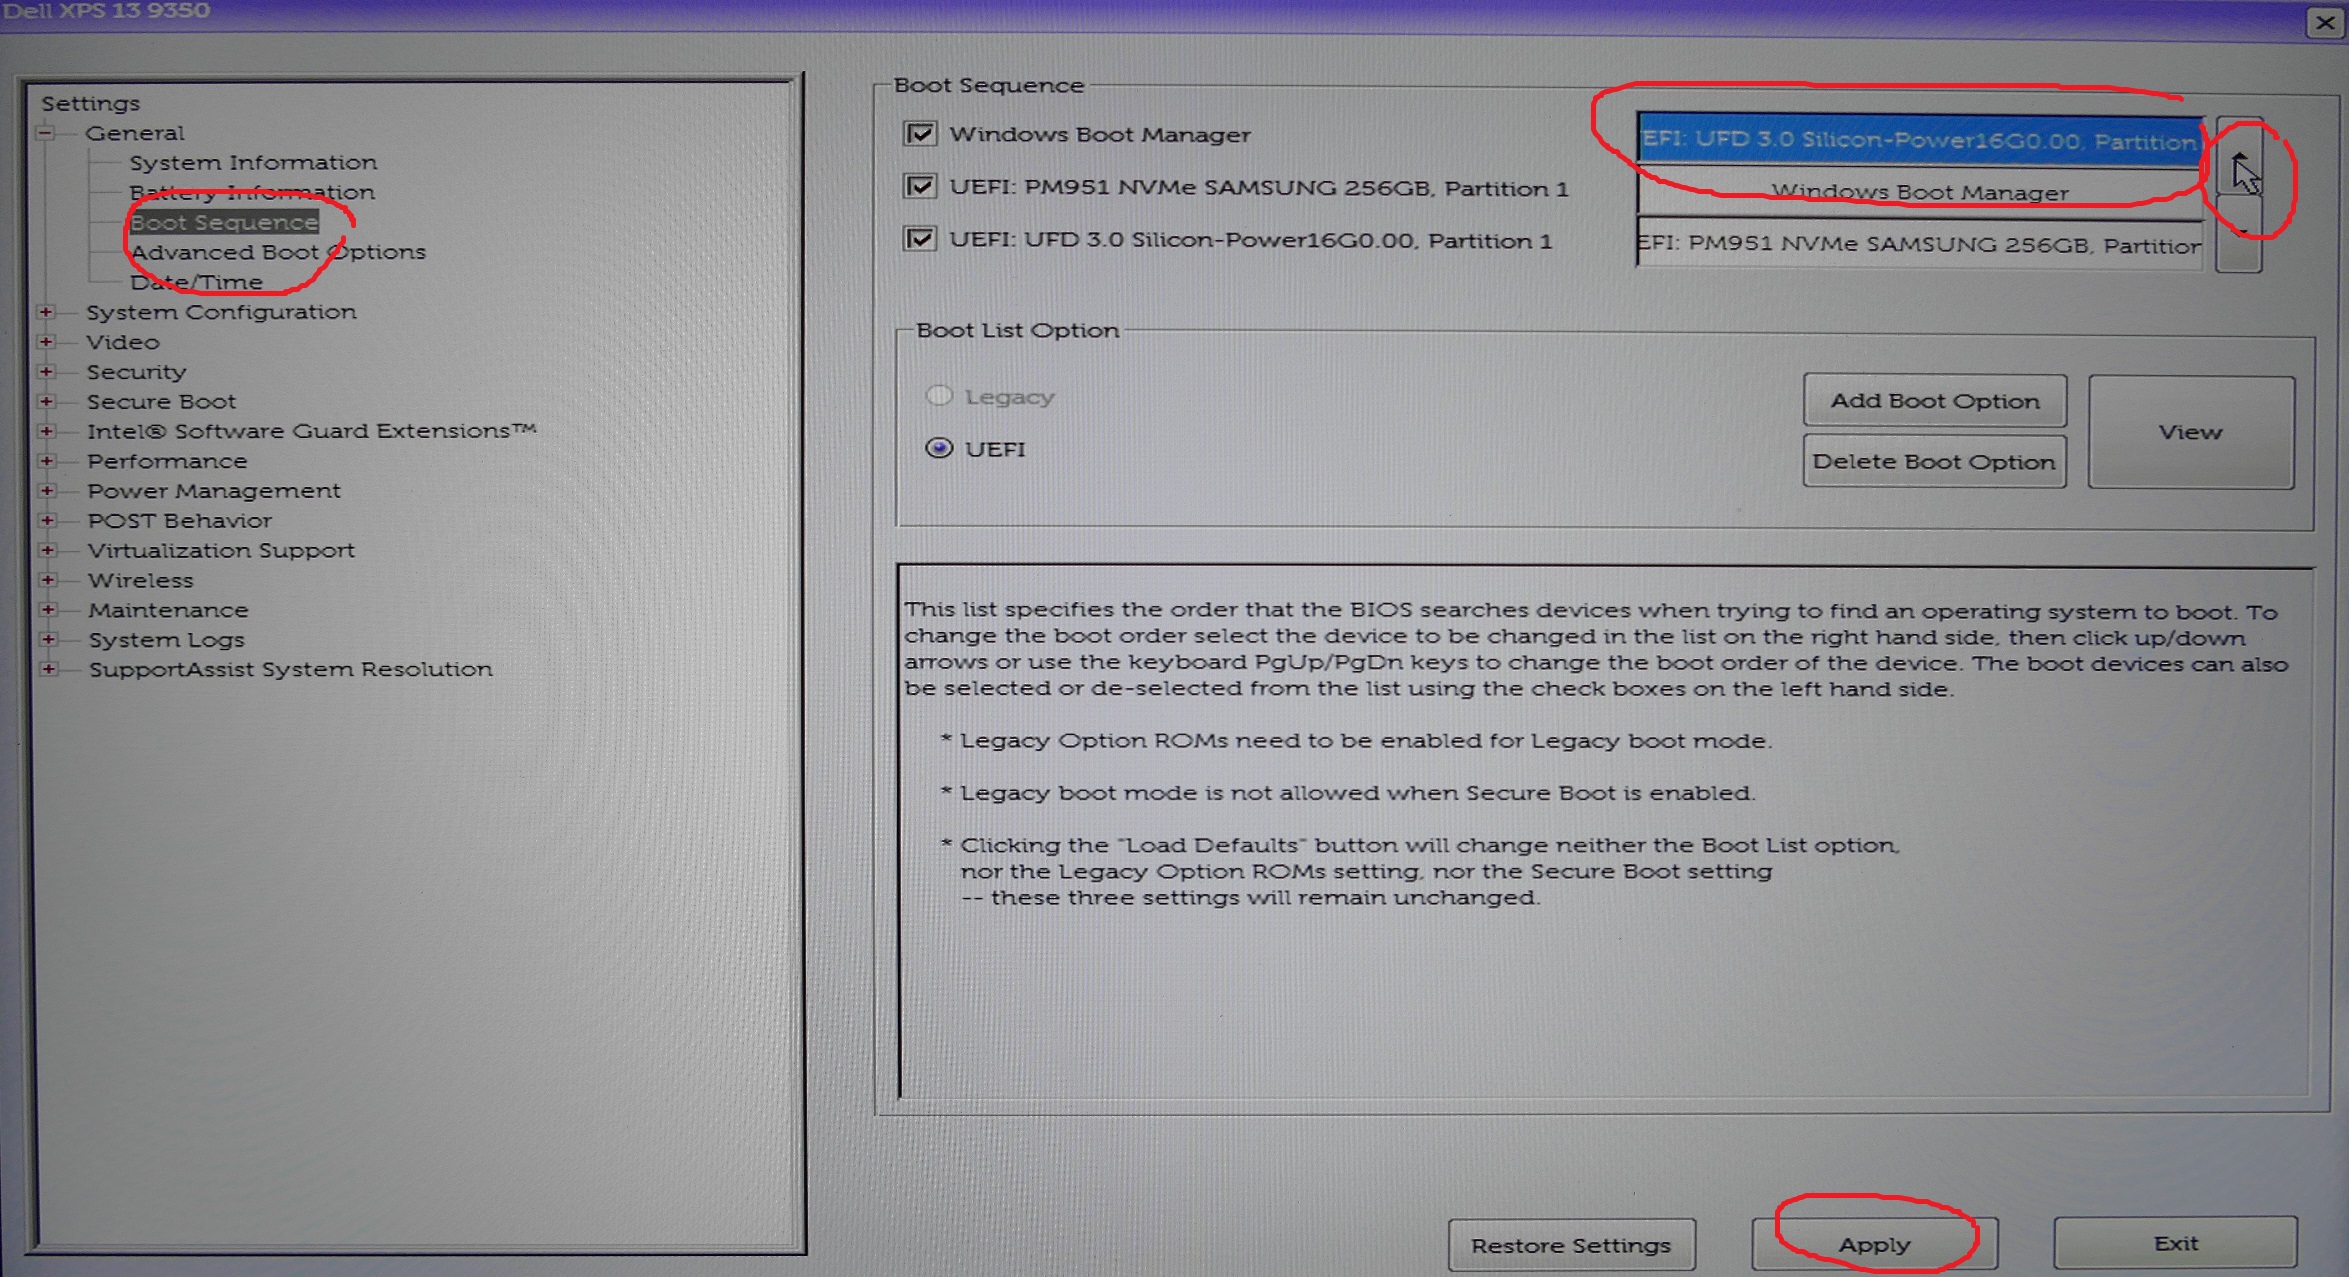
Step 4: Boot from the rescue media, adjust BIOS settings
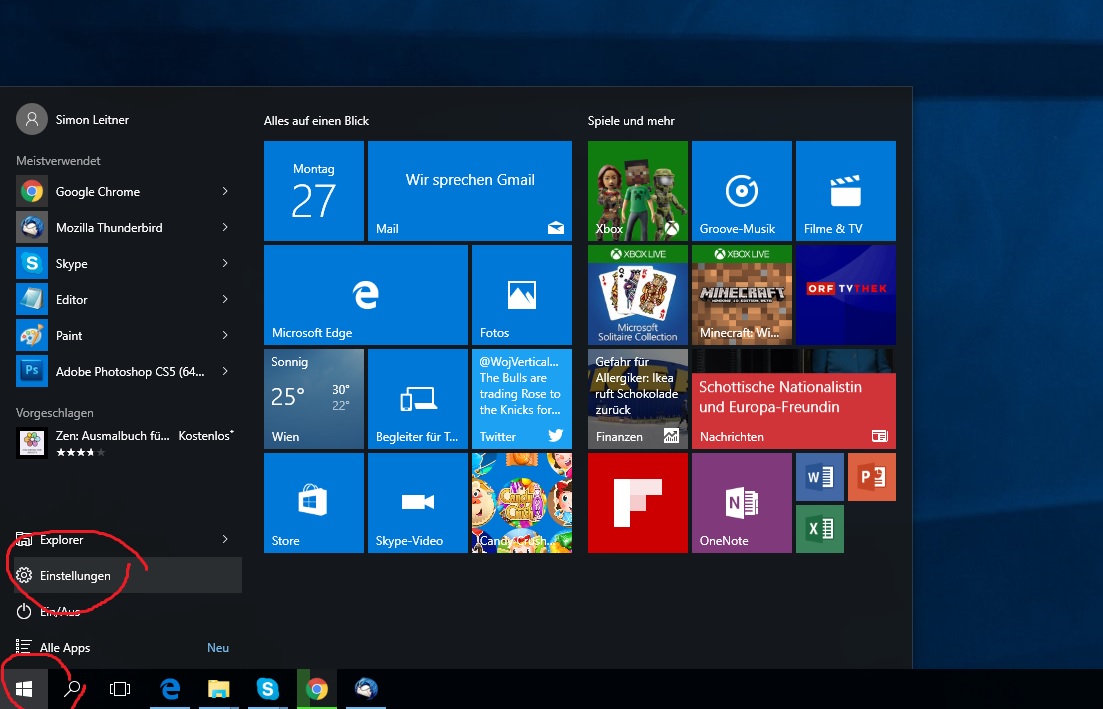
To be able to boot from the rescue media (USB flash drive), the BIOS has to be adjusted accordingly. This is also possible from within Windows and just takes a few clicks.


Swapping the SSD
Now it's time to start with the hardware. On the bottom of the XPS 13 there are 8 Torx (star) T5 screws which have to be removed. The ninth screw - a regular Phillips-type - is a different length hidden under the magnetic XPS flap. For the next step, we recommend using two plastic pry tools to remove the aluminum bottom cover from the base unit. It's best to start at one of the back corners and slowly move towards the front. It pays off to be very careful here, since the aluminum cover is attached by plastic hooks, which could potentially break. Once the cover is loose, it can be lifted up on one side and removed. The hardware is now accessible.
The M.2 SSD is attached with a single Phillips screw. Note: the SSD is under a little bit of tension and could pop out on its own, so some care is required. After the old drive is removed, the new M.2 SSD needs to be inserted at an angle. Once the pins are not visible any longer, the drive can be pushed down and secured with the screw.
For the assembly, simply reverse the steps: insert the aluminum cover on one side first and carefully push it into place, so the hooks can snap in. Insert the screws and screw them in taking care not to overtighten them.


Restoring the backup
Once the new SSD is swapped out, connect the recovery USB flash drive and start the system, which will launch the Macrium recovery software. Select the drive and the image and start the restore. Depending on the size, this can take up to one hour. After the process has finished, remove the USB flash drive and the backup HDD and restart the system. Windows boots and looks exactly like it did at the time of the backup.


Adjusting the partitions
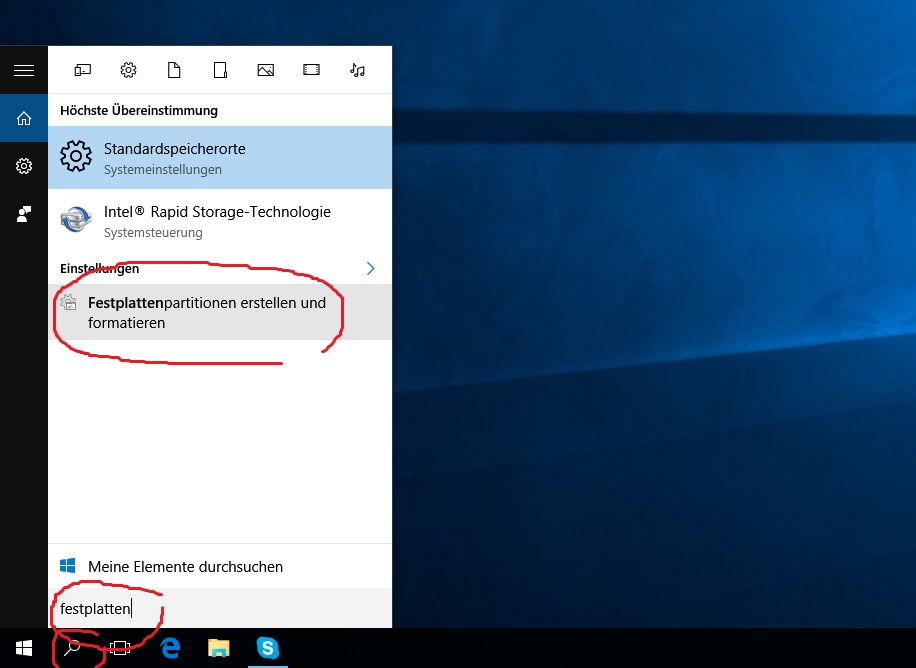
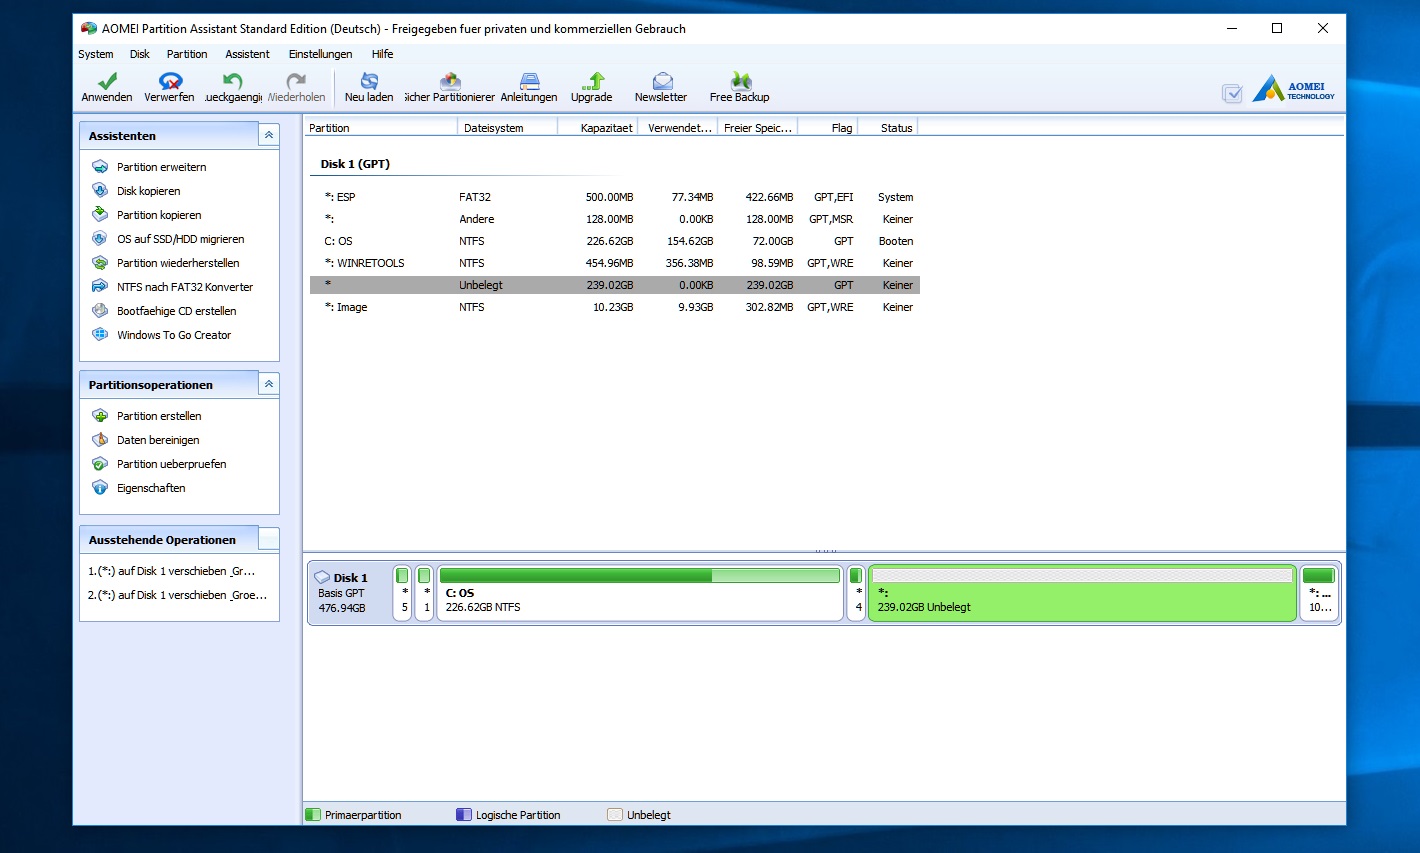
After the reboot, any additional space - if the new SSD is larger - will show up as "unallocated" in the Windows disk manager. To create a new partition, all that's required is to format the space and assign a drive letter (right click within the disk manager). Allocating the space to an existing system partition is more difficult. We recommend using an additional tool - in our case, we downloaded the AOMEI Partition Assistant 6.0 (available here). The software is available free of charge and in German as well. After the download and install, follow these steps:
To extend the system partition, the unallocated space needs to be directly next to the system partition. To accomplish that, the partitions located between need to be moved behind the unallocated space one at a time. We can accomplish that by right-clicking each of them and select "resize". A new window opens and both the size as well as the position of the partition can be adjusted. In this case, we just move the partitions to the right and don't adjust the size. Once the unallocated space is next to the system partition, the above steps can be used to extend the system drive. All that's left is to apply the changes and exit the software.


Performance comparison after the SSD upgrade

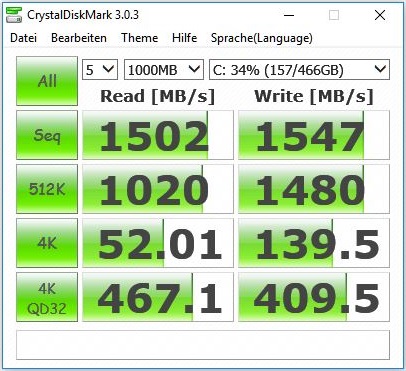
So far, so good. We get to enjoy about double the storage space - but what about the performance? The Samsung PM951 SSD is known for slower write speeds. With the new SM951, this shouldn't be an issue any longer. Samsung promises significantly higher transfer rates for both reads and writes. Instead of 1000/280 MB/s for reads and writes, the new SM951 should be capable of 2150 MB/s and 1550 MB/s for reads and writes, respectively.
The results of our hard drive benchmarks are sobering, however: using AS SSD, we recorded only about 1400 MB/s for sequential reads and 1350 MB/s for writes. Although these results significantly surpass the previous drive (1300/240 MB/s), the are still a far cry from the theoretical limits. The SM951 SSD in the Thinkpad T460s manged a much higher 2000/1400 MB/s. So where's the bottleneck?
Intel's Skylake U-based CPUs have a total of 12 PCIe lanes available. In addition to the hard drive, various other components make use of those lanes - for example WiFi, Bluetooth and USB. The Thunderbolt 3.0 port the XPS 13 is equipped with takes up another 4 PCIe lanes, which theoretically could create a bottleneck. According to Dell, the PCIe SSD also uses 4 lanes, so that shouldn't be detrimental to the transfer rates.
Our web research also confirms our findings: a Samsung 950 Pro - which is, with a theoretical read rate of 2500 MB/s, even faster than the SM951 - topped out at only 1700 MB/s according to some reports. Our comparison table of hard drives and SSDs also shows that some notebooks (equipped with the same drive) are capable of much better performance. If the PCIe SSD is indeed connected at the maximum bandwidth, a possible culprit could be the software respectively the driver. We'll keep an eye on it and will conduct further tests with updates from Dell and Microsoft.
To sum up, we can say that the swap was a success, as it resulted in double the storage space and a pretty substantial increase in transfer speeds (even though the read rates are not quite were we would like them to be). A subsequent test of the battery life - we ran our standardized WLAN test - showed an equivalent (actually slightly better) run time than the original configuration. Many users who have upgraded to a Samsung SSD 950 Pro, however, report decreased run times.
| Dell XPS 13 2016 9350 (FHD, i7-6560U) Samsung SSD SM951 512 GB MZHPV512HDGL | Dell XPS 13 2016 9350 (FHD, i7-6560U) Samsung PM951 NVMe MZ-VLV256D | Lenovo ThinkPad T460s-20FA003GGE Samsung SSD SM951a 512GB M.2 PCIe 3.0 x4 NVMe (MZVKV512) | Dell XPS 13 9350 WQXGA Samsung PM951 NVMe 512 GB | Apple MacBook 12 (Early 2016) 1.1 GHz Apple SSD AP0256 | Asus Zenbook UX305UA-FC040T SK Hynix Canvas SC300 512GB M.2 (HFS512G39MND) | Asus Zenbook UX303UA-R4051T SK hynix SSD Canvas SC300 HFS256G32MND | |
|---|---|---|---|---|---|---|---|
| AS SSD | |||||||
| Copy Game MB/s | 618 | 178.2 | 791 | 753 | 279.8 | 198.8 | |
| Copy Program MB/s | 333.8 | 98.1 | 421.9 | 271.8 | 187 | 160.3 | |
| Copy ISO MB/s | 830 | 222.3 | 1135 | 1041 | 545 | 325.4 | 249.3 |
| Score Total | 1992 | 1684 | 2439 | 3158 | 1094 | 909 | |
| Score Write | 606 | 318 | 621 | 664 | 405 | 308 | |
| Score Read | 911 | 935 | 1218 | 1679 | 452 | 399 | |
| Access Time Write * | 0.031 | 0.035 | 0.033 | 0.031 | 0.115 | 0.07 | |
| Access Time Read * | 0.048 | 0.088 | 0.041 | 0.046 | 0.186 | 0.074 | 0.1 |
| 4K-64 Write | 363.4 | 186.3 | 366 | 492 | 283 | 296.6 | 213.4 |
| 4K-64 Read | 722 | 767 | 968 | 1497 | 509 | 375.5 | 331.2 |
| 4K Write | 107.4 | 108.3 | 114.4 | 116.5 | 22.1 | 64 | 65.1 |
| 4K Read | 46.9 | 35.4 | 45.41 | 38.29 | 16.4 | 26.87 | 20.4 |
| Seq Write | 1348 | 235.3 | 1407 | 559 | 651 | 444.5 | 301.6 |
| Seq Read | 1413 | 1323 | 2039 | 1442 | 1056 | 496.8 | 474.5 |
| CrystalDiskMark 3.0 | |||||||
| Write 4k QD32 | 409.5 | 245.6 | 277 | 482.4 | 315 | 274.7 | 263 |
| Read 4k QD32 | 467.1 | 399.7 | 561 | 572 | 464 | 262 | 325.4 |
| Write 4k | 139.5 | 133.9 | 139.3 | 142.2 | 20.5 | 71.9 | 74.6 |
| Read 4k | 52 | 39.63 | 51.3 | 42.36 | 14.6 | 28.08 | 21.41 |
| Write 512 | 1480 | 276.3 | 1506 | 592 | 678 | 327.1 | 321.2 |
| Read 512 | 1020 | 685 | 1339 | 615 | 616 | 301.6 | 331.4 |
| Write Seq | 1547 | 311.4 | 1530 | 590 | 638 | 412.1 | 321 |
| Read Seq | 1502 | 1131 | 1778 | 1236 | 754 | 469.1 | 465 |
| Total Average (Program / Settings) |
* ... smaller is better